
Posted on October 11, 2018 by Admin
How to bring IPTV channels to Kodi
Table of Contents
- How to bring IPTV channels to Kodi (New Version)
- How to bring IPTV channels to Kodi (Old Version)
Kodi is an open-source media player which is a free application that functions as a digital media center. This application enables you to play your media, cast it between various devices, from a primary location to other devices.
How to bring IPTV channels to Kodi (New Version)
Installing Kodi is astonishingly simple. All you need to do is to download Kodi, double-click on the Kodi image and then perform the setup wizard. It’s that simple! After Kodi installed, you can download a big variety of add-ons to improve the experience. Here we will show you how to install IPTV on Kodi.
Step 1: Start by downloading Kodi based on your operating system at https://kodi.tv/download. In this case, we select “Windows“.
*Please note, here we guide how to setup IPTV in Kodi in Windows but the installation process is very similar in all operating systems.
Step 2: Select 64 Bit or 32 Bit based on your operating system.
Step 3: After install and open it, click on “Add-ons“. What is Kodi Add-on
Step 4: Now click on “Download” then select “PVR clients“.
Note: We are going to download and install the PVR add-on here, after installing no need to go to the “Download“.
You can find the installed add-ons “My add-ons“
Step 5: Select “PVR IPTV Simple Client“.
Step 6: Now click on “Install“.
Step 7: After installing “PVR IPTV Simple Client” head back to “My add-ons” then “PVR Clients” and run the add-on.
Now click on “Configure“
Step 8: Now select “M3U Play List URL“.
Step 9: Enter the M3U URL provided by your IPTV distributor and click “OK“.
Note: The progressive IPTV providers give you a dashboard which you can generate your M3U url in dashboard.
Step 10: Now go to “EPG Settings” and click on “XMLTV URL” for EPG. What is EPG
You can get EPG url from your IPTV provider.
Step 11: Now paste your EPG URL and click “OK“.
Step 12: Click on “Enable“.
Note: After you enable the add-on you will see “Disable”, this means the add-on enabled so do NOT to click on “Disable” again.
Step 13: Head back to “TV” and click on “Channels“.
Step 14: Wait until you see the notification about updating channels and the installation process is over.
Well done, you have IPTV channels now.
How to bring IPTV channels to Kodi (Old Version)
This is the old version of Kodi and we highly recommend that you install the latest version for a better viewing experience.
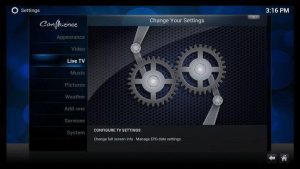
Step 1: First start by enabling the “Live TV” feature by selecting “System” and then “Settings“.
Step 2: Select “Live TV” from the menu.
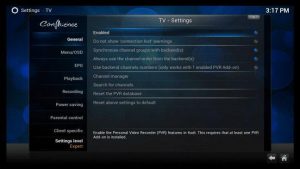
Step 3: Select “Enable” at the top.
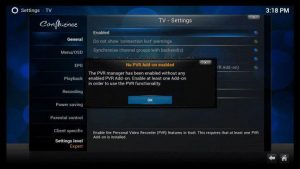
Step 4: A message will be shown asking to enable a PVR addon. Click OK.
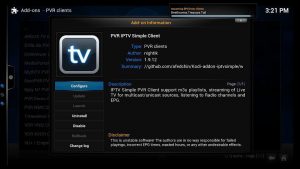
Step 5: This will take you to the add-on screen for all the PVR clients. Select the “PVR IPTV Simple Client“.
*This add-on is one of the best extension for streaming IPTV channels.

Step 6: After selecting “Enable” click on the “Configure“.
Step 7: Change general location to the “Remote path” (Internet Address) and paste the “M3U URL” provided by your IPTV distributor.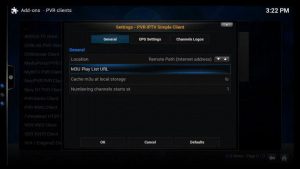
Step 8: After uploading the M3U playlist, Press OK, exit and restart KODI.
After restarting Kodi, A Live TV section will appear in the main menu. Click on it and from here you can stream IPTV channels on your device.
